To bake or to buy? Baking your own Æbleskiver

Maybe you are one for the ready to eat version of this delightful sweet afternoon treat. However, making your own is extremely gratifying as our expat writer found out.
The article continues below.
Pictures and text by T.L. Power
The Christmas season in Denmark means æbleskiver. The delightful little donut-like balls of fried dough have arrived in supermarket freezers, ready to be heated up and served with a dusting of confectioner’s sugar and dipped in jam.
We’ve eaten our share of these treats since our arrival in Denmark, but I’ve been curious about the home baked version of æbleskiver. Fresh and home made is always better than store bought, right?
So, I tried my hand at making them myself.
The article continues below.
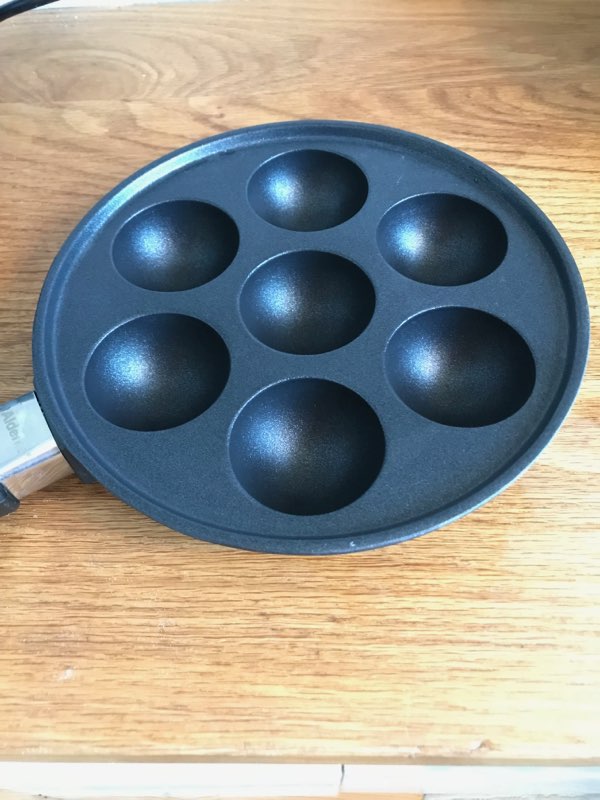
The ingredient list for æbleskiver is simple and everything you will need can easily be found at any grocery. You should, however, invest in a special æbleskiver pan.
Look for this anywhere they sell regular pots and pans. It looks like a regular frying pan, with little half-circles cut into it.
Start by separating your eggs, reserving the egg whites to be beaten later. Dump everything else into a blender or food processor and mix it up for two minutes. The process to make this batter could not be easier.
Refrigerate the mixture for thirty minutes and in the meantime whip up your egg whites until they are stiff. Fold them gently into your batter and you are ready to cook.
Not so difficult to make with a little practice – find out more below.
It gets easier after the first ones
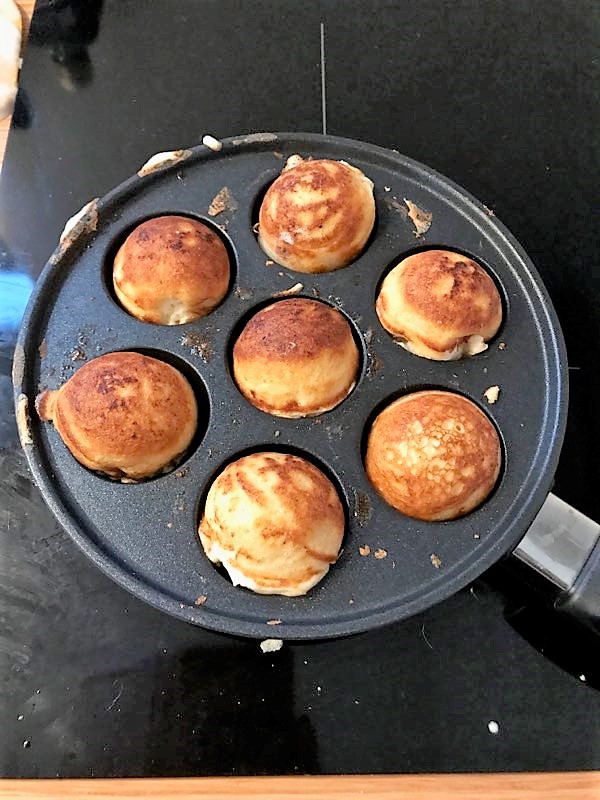
My first few batches of æbleskiver were smallish and flat and looked a bit more like a tiny pancake than an æbleskive. Each batch improved, however, and by the last couple of batches, my æbleskiver looked almost as round and fluffy as the supermarket variety.
The takeaway from this is that the pan needs to be very hot. The pan is heavy and dense and takes much longer to heat than a regular fry pan. Once the pan is very hot, work quickly to drop the butter into the holes, and then pour the batter in quickly before the butter burns.
The batter had begun to settle somewhat by my later batches, and I worried that it would affect my æbleskiver, but the cooking was not affected.
The batter will begin to form bubbles and you will notice it browning at the sides. At this point, turn the æbleskiver over gently, using two meat skewers. Once they lift away easily and are brown on all sides, your æbleskiver are ready to enjoy.
My verdict on the æbleskiver is that although the frozen variety are quick and easy, we prefer freshly baked. I will make these again and feel confident enough to serve them to guests with a warm cup of gløgg.
Find here our article on how to make the Danish version of mulled wine – the gløgg
Find our recipe for æbleskiver below.
Æbleskiver Recipe
Separate the eggs, reserving the egg whites.
Pour the buttermilk into a blender or food processor, add all other ingredients except the egg whites and butter. Blend for two minutes. Refrigerate the dough for 30 minutes. Whip the egg whites until very stiff and fold them into the dough. Pour the dough into a jug.
Heat the pan until very hot and place 1 tsp butter into each hole. Fill ¾ of the way up with batter. Once they brown on the edges and form bubbles in the middle, turn them with two meat skewers. Repeat with remainder of batter.
Cook time is 5-6 minutes.
The article continues below.
Ingredients:
3 eggs
4dl buttermilk ( the Danish kernemælk)
240 g flour
1 tsp lemon peel
½ tsp baking soda
1 Tbsp sugar
¼ tsp salt
butter for baking